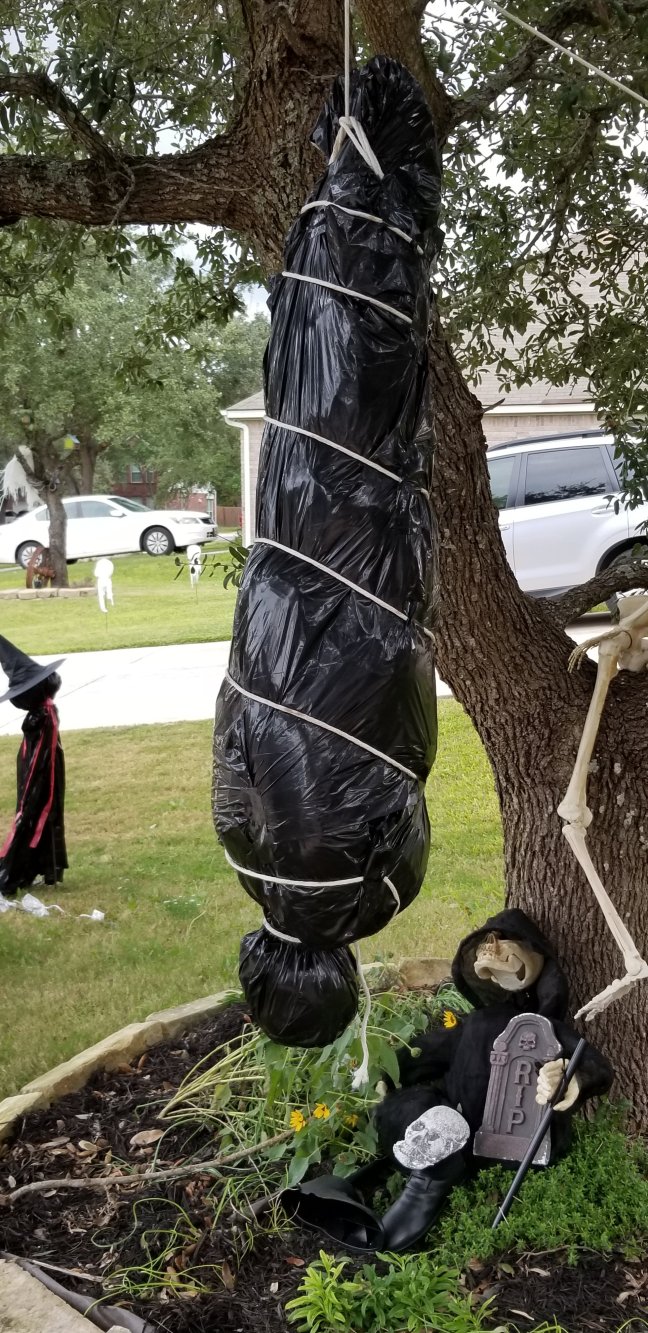
Easy to Make a Corpse for Halloween


I made my original dead body bag about 4 or 5 years ago and I've learned some things about how to make these after having to repair it a few times. Like most of my projects: this is simple but impressive. I've seen some bodies in our neighborhood and online instructions (using plastic containers) and they are not very realistic.

The way I made mine originally was: I took a pair of old jeans and a long sleeved shirt, stuffed them with packing paper (we had from a move) and added a styrofoam head and old tennis shoes. It looked pretty cool until our sprinklers hit it (we're in Texas, so our first freeze is around Thanksgiving. Our grass is still growing during Halloween. But this also would apply to rain.) When our sprinklers hit the body, the whole thing unraveled and the paper stuffing collapsed. Half was up in the tree. Half was on the ground.


Rule number one for all outside decorations: don't use paper products! I also learned that the body needs support underneath the trash bag wrapper (which I accomplished with duct tape), and that black trash bags do not show up at night. You'll need a spotlight.
I decided to take what I've learned and redo our body this year. Here are some pointers and instructions that will help you make a convincing, light weight, simple and cheap body for your yard.
Get your supplies rounded up. You will need:
Long sleeved adult shirt
Old pair of jeans
Duct tape
Old pair of sneakers
Styrofoam head (found at the very back of hobby stores, usually on end caps. Not with the floral foam.)
3 black lawn and leaf sized trash bags
One of the following:
Paper (I don't recommend this option but you can get 1 season out of it.)
Plastic grocery bags (you will need a bunch of these!)
Bubble wrap

Optional:
Rope (to tie up the body and hang it from something. I hung ours in our tree.)
Instructions:
Stuff your shirt. I still have the shirt full of packing paper. It takes a lot of stuffing to fill the body shape and I didn't have time to fix this part. I did roll long lengths of bubble wrap and used that in the arms. I also stuffed the legs with plastic grocery bags (it takes a ton of bags for this, and bubble wrap is faster, but both work.) Just the torso of mine has paper now.

Tape your shoes together like this:

Run your duct tape from the shoulders to the crotch and back up to the shoulders. Do this on both shoulders. This takes the weight off of the trash bags which will just stretch out and possibly tear without this inner support. It will look a little like suspenders.

Tape legs and shoes together (this doesn't need to be too stable, it's just to keep them at the right angle when you wrap it all.

Tape the head to the shirt. Again, this doesn't need to be perfect it's just to keep it in place while you wrap everything. Tape the wrists together.


Open a black trash bag. Put one corner (at the bottom of the bag) over the head and tape around the neck. Tape any loose areas away from the face so that the shape of the face can be clearly seen through the bag. Run the rest of the bag down the torso.

Open the second black trash bag. Run it up, over the shoes, and up the legs. For my particular set of clothing, the two trash bags did not completely meet. If yours does, you don't need the third bag. If they don't meet: tape several strips of your duct tape (on the back, front and sides) across the open space to keep it together. The third bag should not be a part of the support. It will just add one more layer and make it harder to keep it together.

Take your third bag (if you need it) and cut the end off and cut down one side. This will give you one large sheet of plastic. I also cut the red plastic ties off, that came with mine, because I didn't like the look.

Tape one side of the opened bag down the center of the back of the body bag.
Roll the body up in the rest of the bag and tape shut.

(This is a photo of the body face down.)
If you are using rope, start at the neck. Tie tightly and keep the rope taught as you tape it around the body. I only tape a strip on the sides as I go. Pull the rope taught like a shoe lace. The tape will let go of the rope and stick to the bag, so you can keep tightening it even after you're done wrapping it. Tie securely at the ankles, with plenty of rope left over.

Throw your rope into the tree, tie it off and you're done!
Let me know if you used these instructions. If you post your creation online, please link back to where you got the instructions!

Here are some other things I made for Halloween this year: A thirty foot, two story spider web I made from yarn.


Interested in more awesome, cheap Halloween ideas? Try these!

Silver Faceless Aliens

Easy Packing Tape Ghost

Milk Jug Spider

Last Minute Kid Friendly Halloween Craft Ideas

Witch Circle/Ghost Ring

Haunted Heads
Cousin It… Oh Yeah!
Source: https://crazygreenthumbs.com/2019/09/15/how-to-make-a-bagged-dead-body-for-halloween-2/

0 Response to "Easy to Make a Corpse for Halloween"
Post a Comment